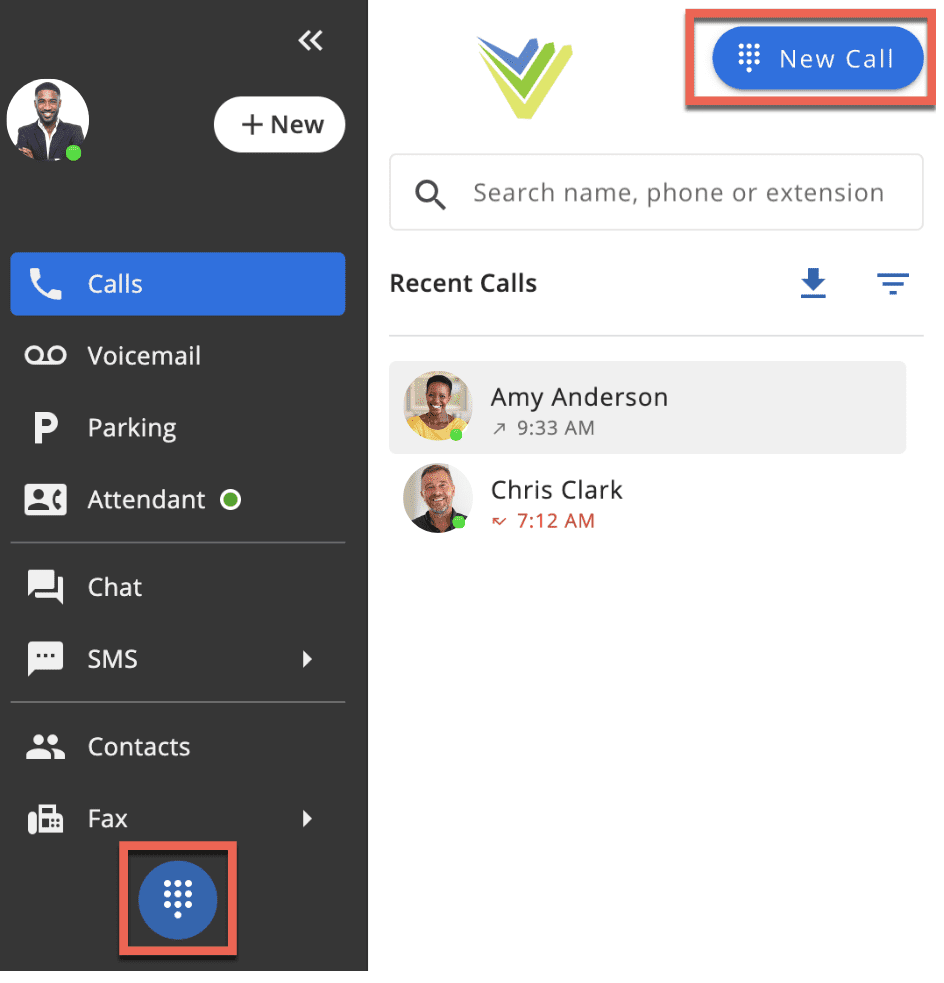
The VQTECH Calls tab allows you to view recent call details and initiate calls from three locations (The ‘+New’ button on the upper left-side menu, the ‘New Call’ button at the top of the page, and the always-present Dial Pad button on the lower left-side menu).
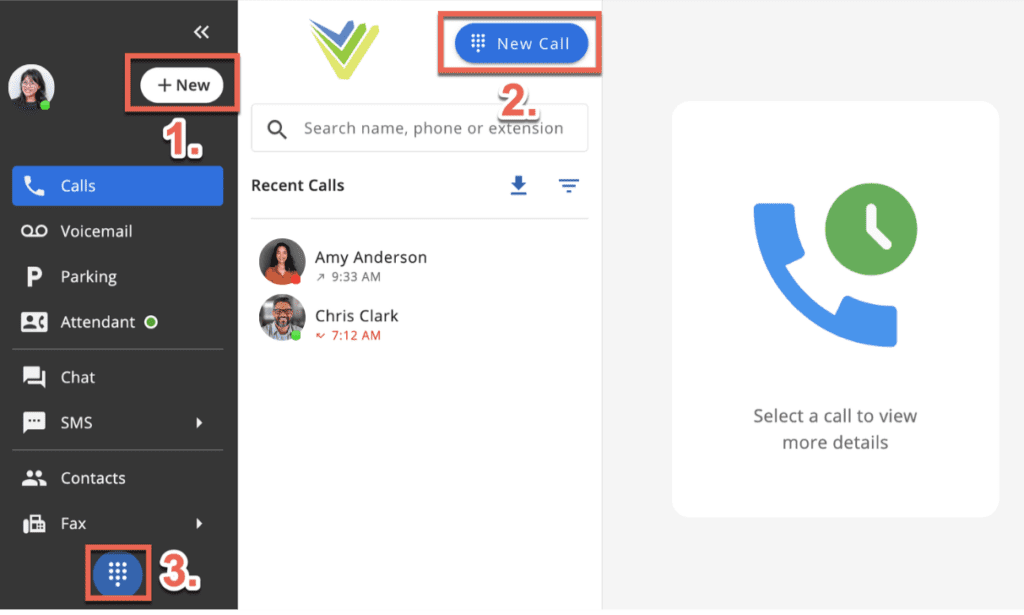
The ‘Calls’ tab also allows the ability to view a contact’s information and quick action icons by clicking their name within the ‘Recent Calls’ section.

When the Company Contact is highlighted in the example below, the ‘Call’ and ‘Chat’ quick action icons appear on the top right side of the page.
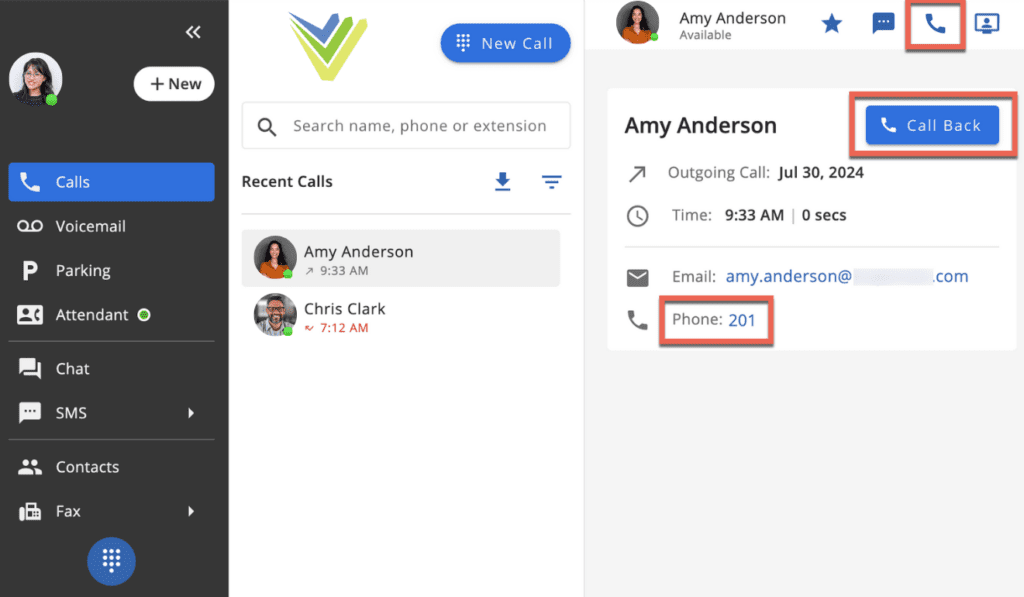
To begin a call with the contact you are viewing, you may click the Phone icon, the ‘Call Back’ button, or you may click the contact’s phone number, as seen in the image above.
Similar options can be seen on Voicemail details, Chat and SMS conversations, and Contacts.
Quick Reply Options
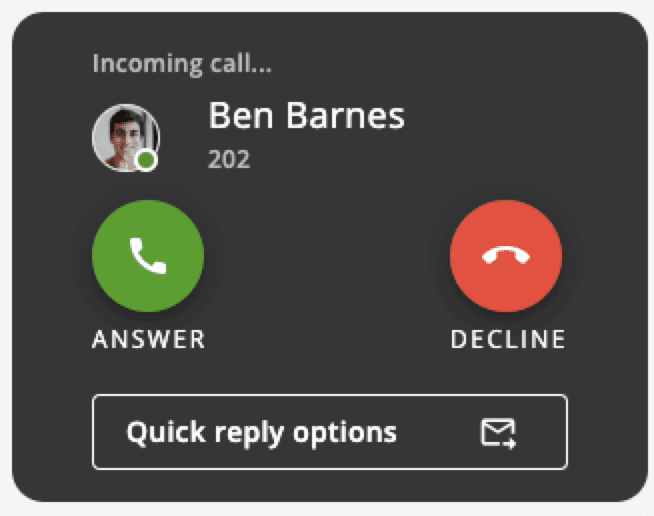
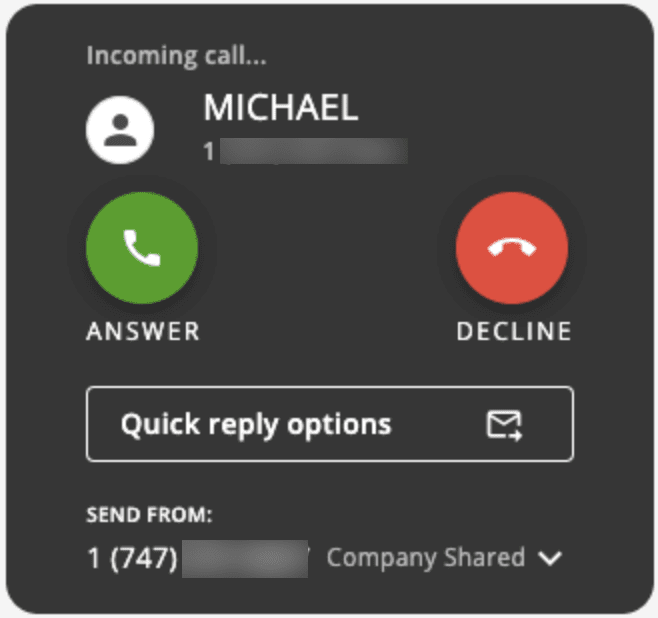
If you receive a call from either a Company Contact or a number that supports SMS, you can take advantage of a ‘Quick Reply’ option that allows you to send a quick message to the recipient without needing to answer the call.
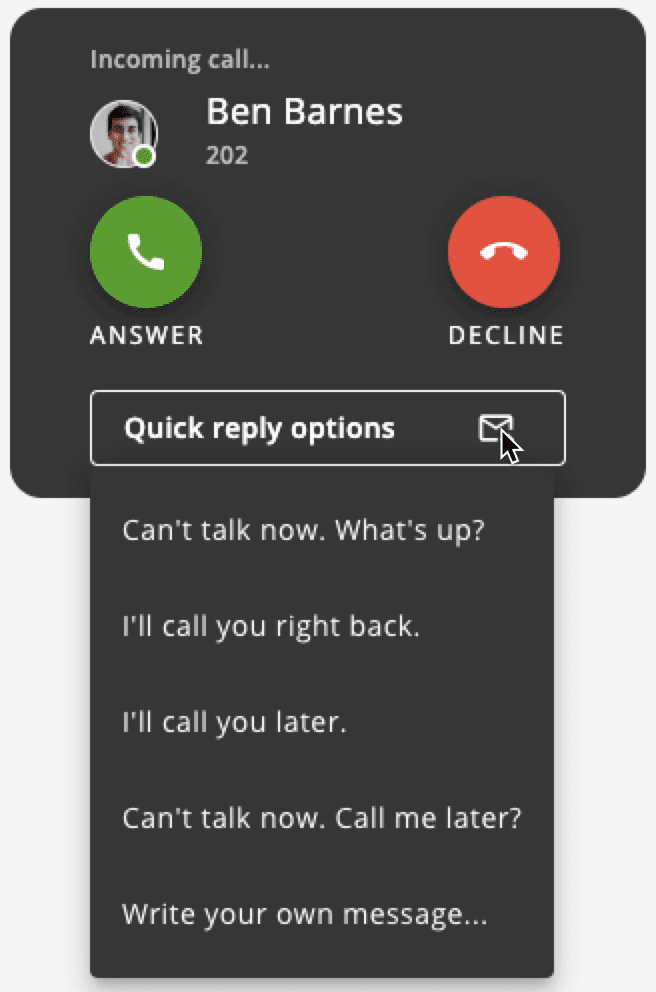
Once the ‘Quick reply options’ button is selected, you may choose from several pre-written responses, or you may write your own message that will be sent to the recipient.
If the call receiver has more than one number assigned to them, they may select which number they want to send the quick reply to (applicable for SMS messages).
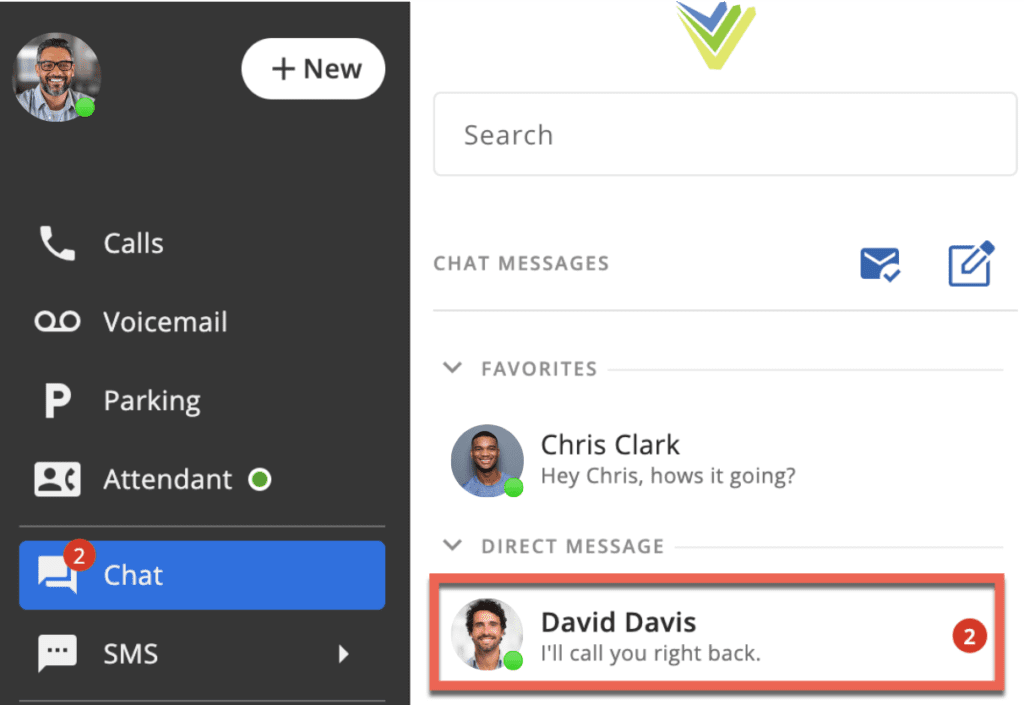
If the caller is a company contact, the quick reply message will be viewable in the Chat tab.
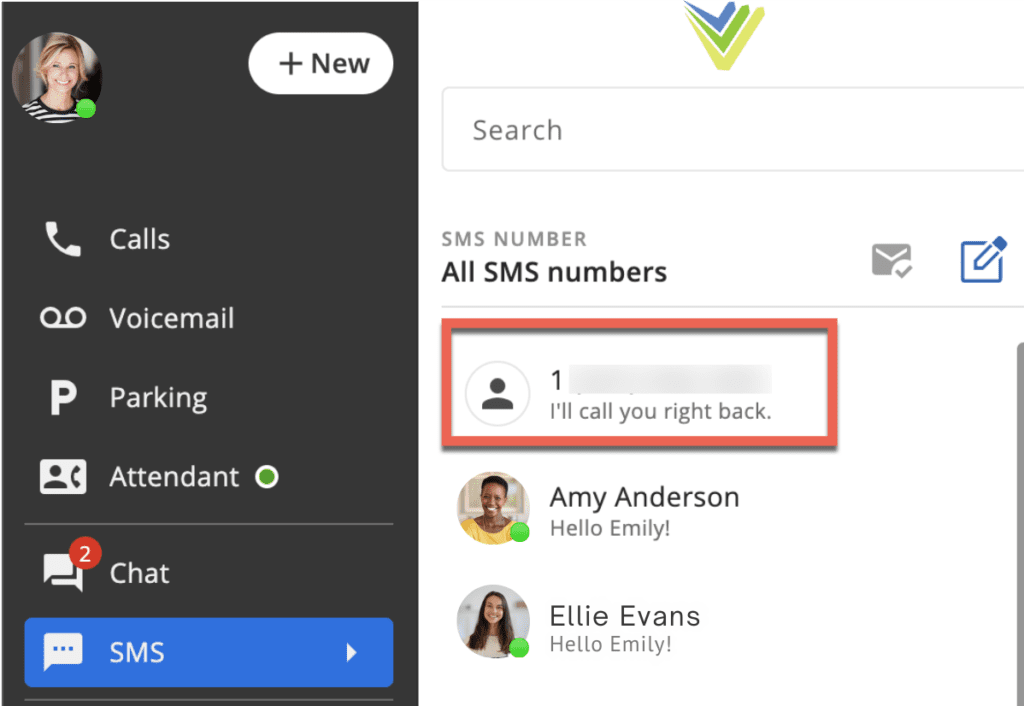
If the caller is not a company contact, and is calling from an SMS-capable number, the message will instead be sent as an SMS, and can be viewed in the SMS tab.
Dialer
The dialing modal can be accessed from any page by selecting the ‘Dial Pad’ icon at the bottom of the left-side menu or the ‘New Call‘ button found in the top right corner of the Calls tab.
Once selected, the dialer allows users to enter an extension, or phone number, or to choose a contact to dial from a list.
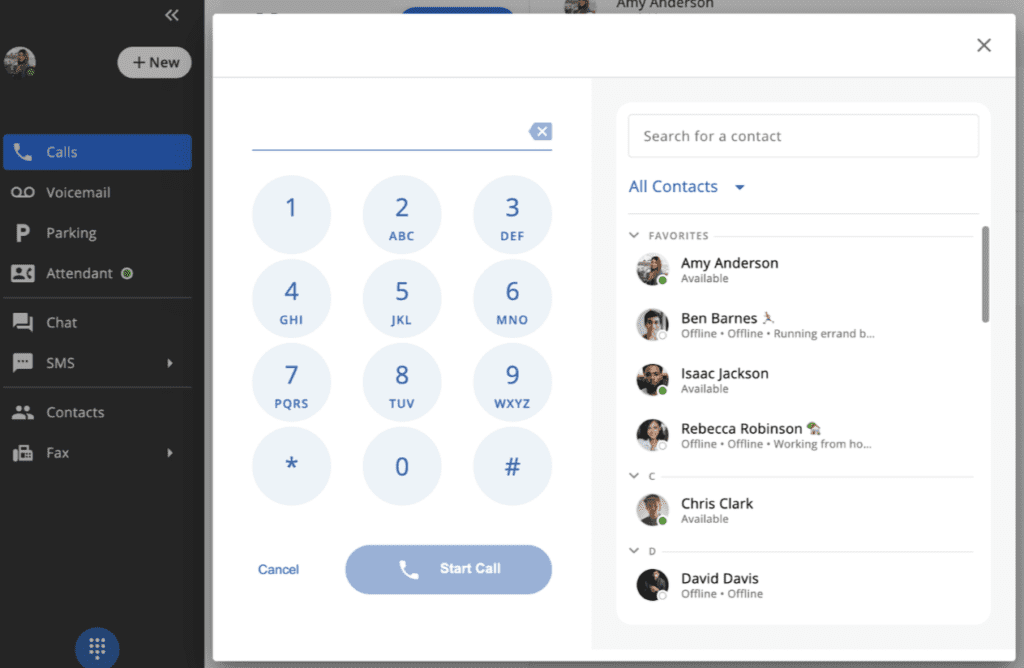
If a user enters digits or enters a name in the search bar, the contacts list will be matched. Once the user locates the contact they are looking for, they can easily call any of the numbers the user has in their contact information.
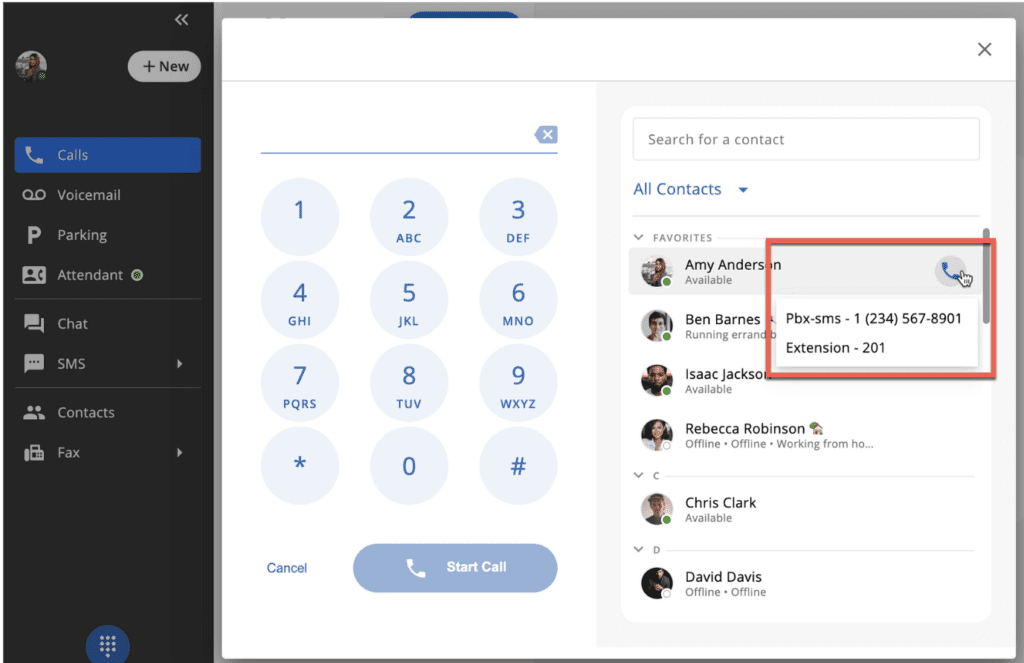
If the user has only one number listed, it will be dialed immediately.
Caller ID Selection
Users that have multiple numbers assigned to them will see a “Dialing from:” section at the top of the dialer menu that shows the current CallerID and includes dropdown option to select another CallerID, if desired.
Note: If you recently assigned multiple numbers to a user, you may need to log out and log back in before the changes are visible.
The currently selected CallerID will be indicated by a blue check mark, as seen below.
Note: The CallerID setting changes the CallerID for all of the user’s devices.
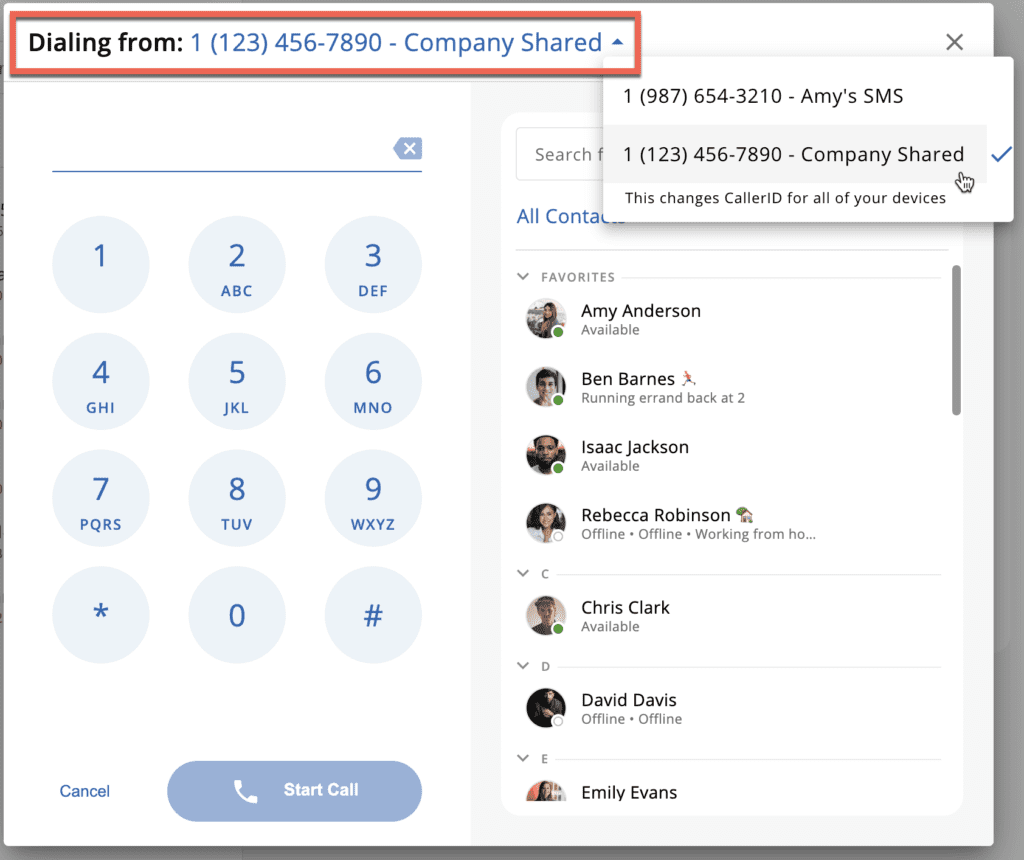
If the number has a description associated with it, this description will display to the right of the number (pictured above). Numbers without a description will instead show ‘null’ next to the number.
CallerID Assignment for Phone Numbers must be completed before the CallerID selection will appear. Please contact your Telecom provider if you need assistance.
Active Call Window
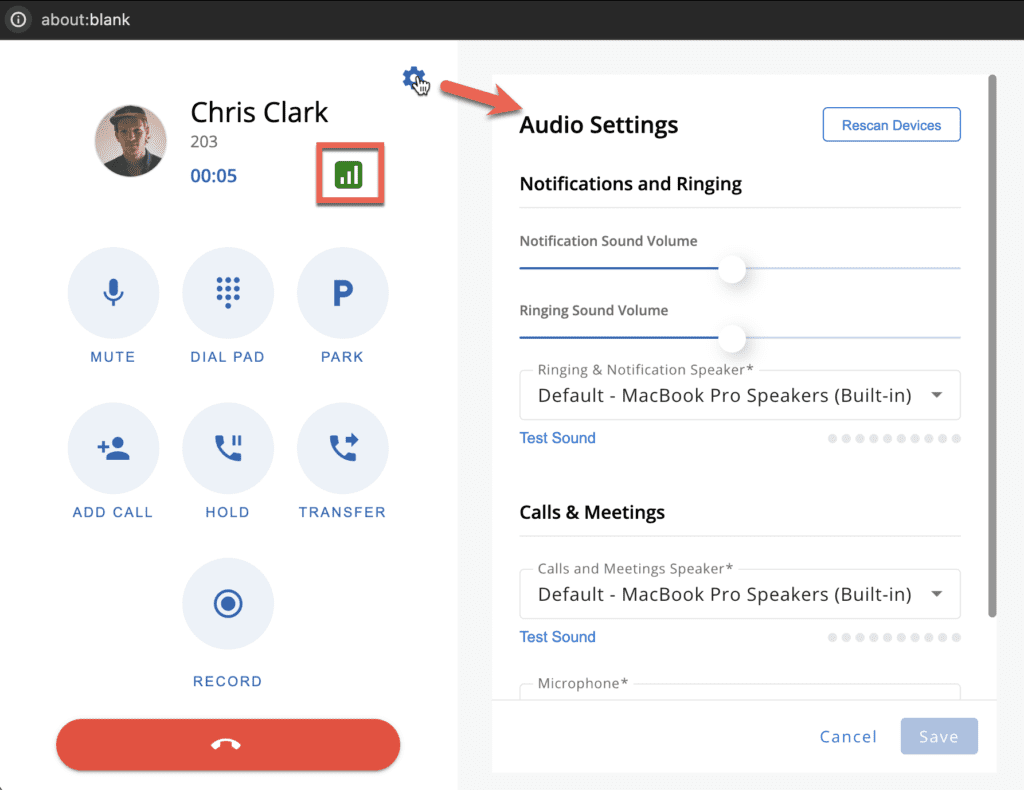
The active call window is designed to look and feel like a familiar cell phone application.

The Active Call window includes a connection health indicator (pictured above) and convenient access to audio settings via the ‘Cog wheel’ icon at the top of the active call window. Audio Settings may also be accessed via User Preferences
Mute
Selecting the ‘MUTE’ button will shut off the microphone while still allowing the user to hear the call.
Dial Pad
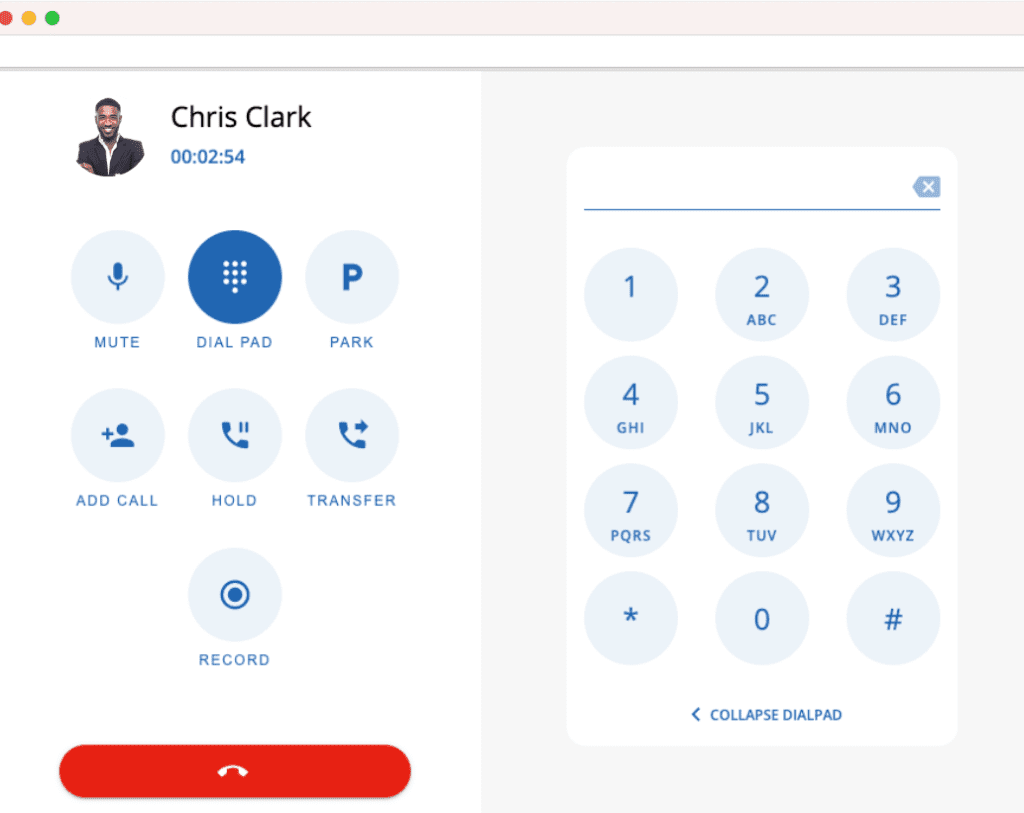
Selecting the ‘DIAL PAD’ button will reveal a dial pad for entering DTMF digits into the call. Clicking on the dial pad button again or clicking on ‘Collapse Dial Pad’ will collapse the dial pad.
Park
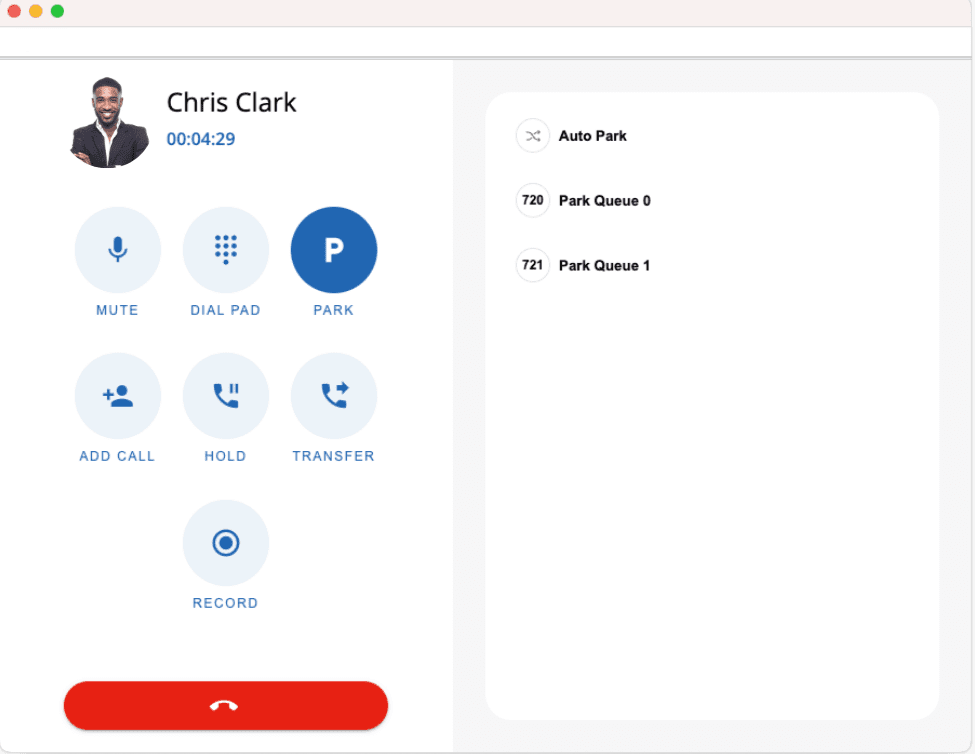
Selecting the ‘PARK’ button allows the user to easily park a call. By clicking ‘Auto Park,’ the call will be parked into the first available park queue. The user can also click on a particular park queue to put the call into the directed call park.
Once a call is parked, a message will appear, letting the user know where the call was parked and how to retrieve the call from a hard phone.
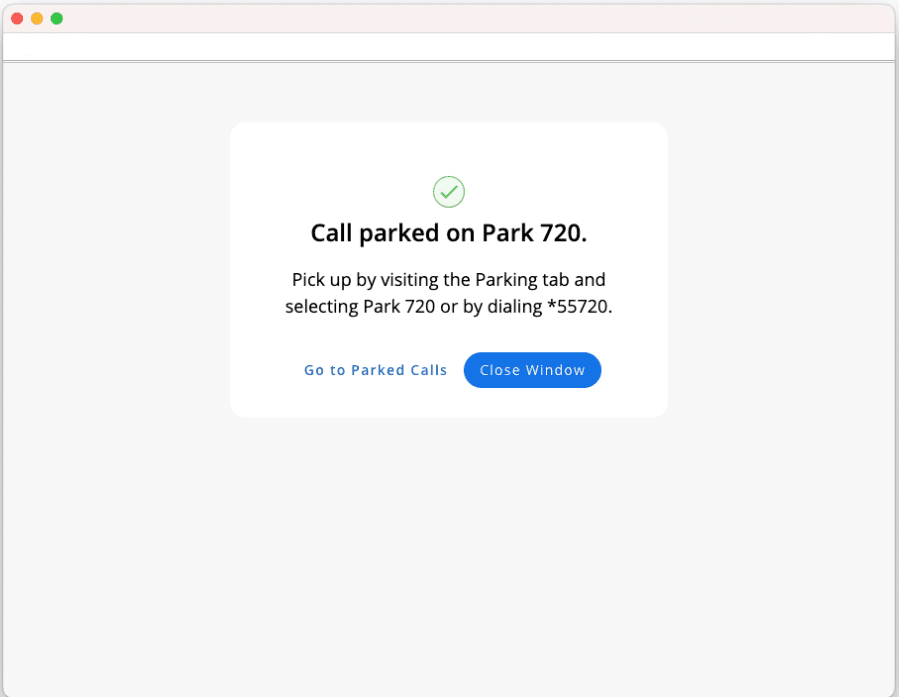
Please see our page on Parking for info on picking up the call.
Add Call
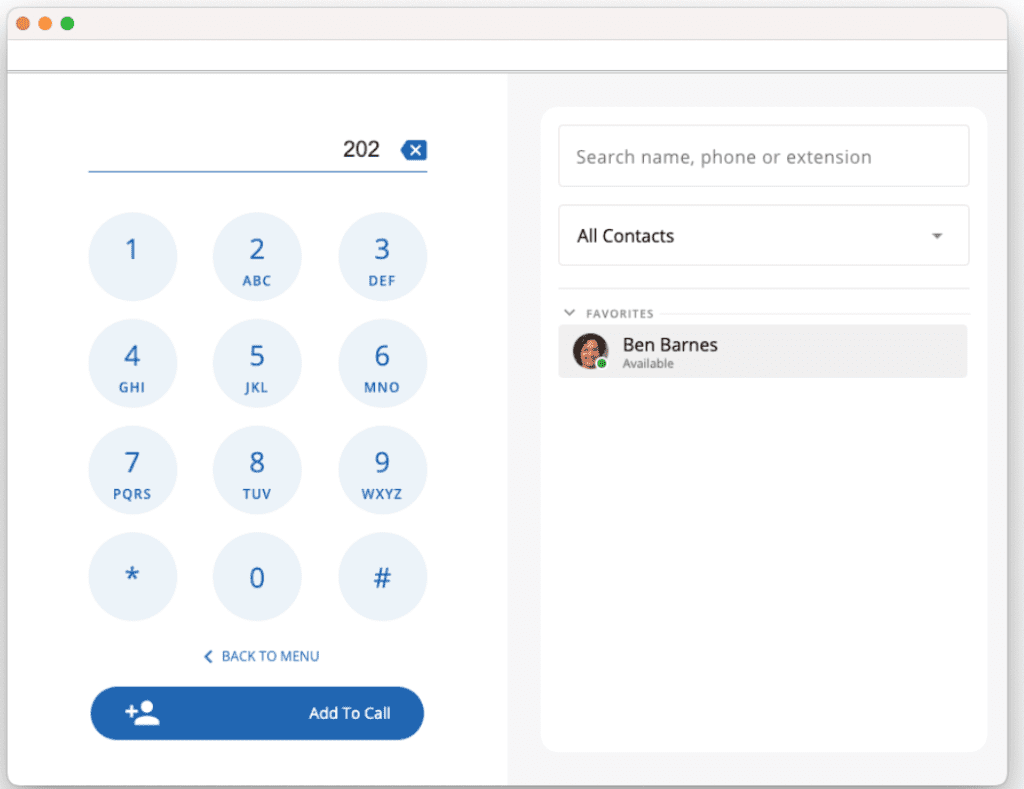
The ‘ADD CALL’ button allows the user to form a 3-party conference call. Once selected, a dialing dialog box allows the user to dial a phone number, or extension, or select a contact from their contacts list.
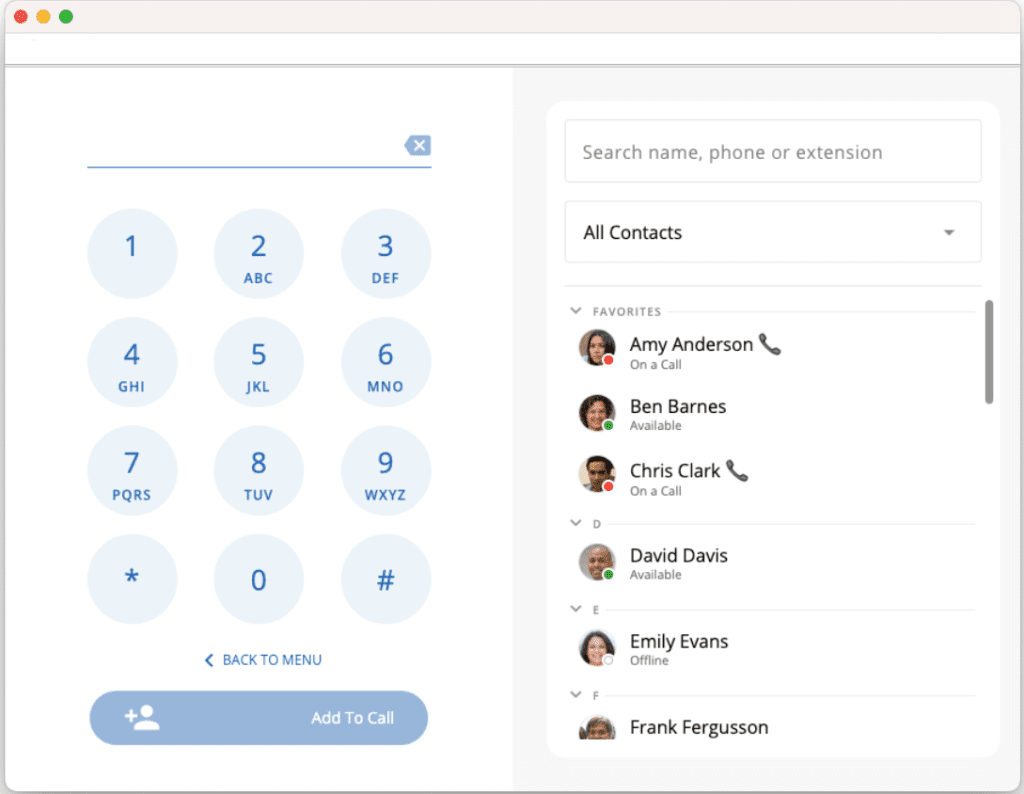
Once a number is dialed or contact selected, click on ‘Add To Call.’ The first call will be placed on hold, and the new caller becomes the active call.
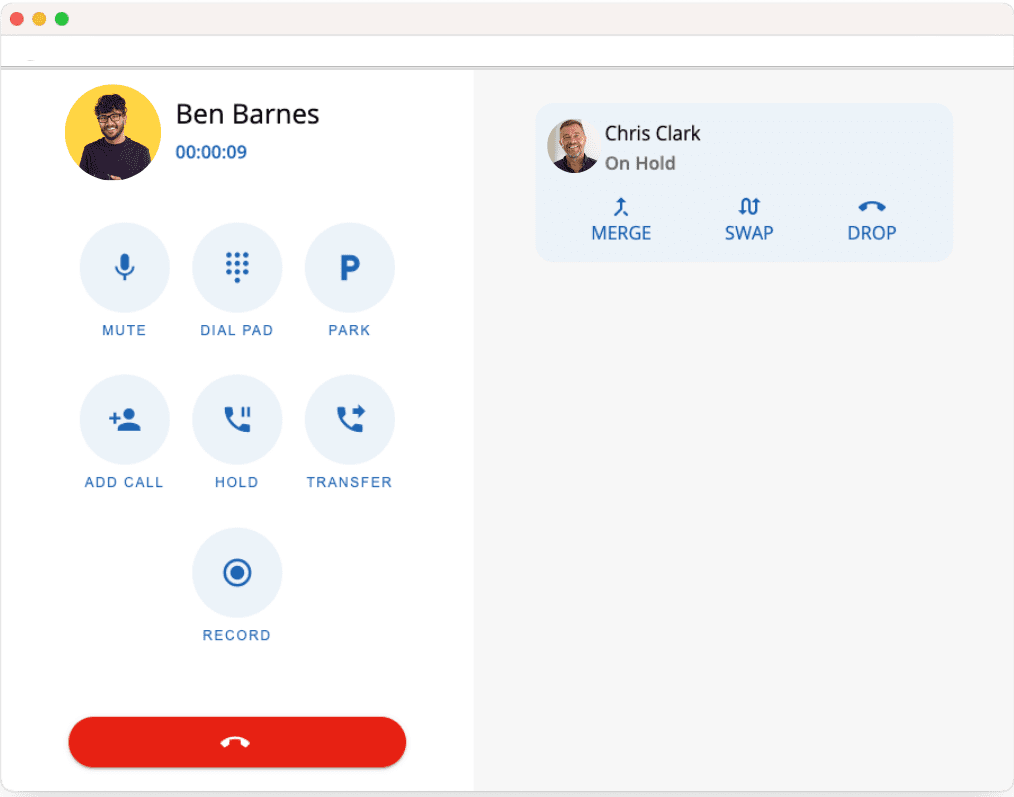
The user who initiated the 3-party conference may then select one of three options:
- The ‘MERGE’ button conferences both parties together.
- The ‘SWAP’ button places the currently active call on hold, and the previously-on-hold call becomes active.
- The ‘DROP’ button drops the original call.
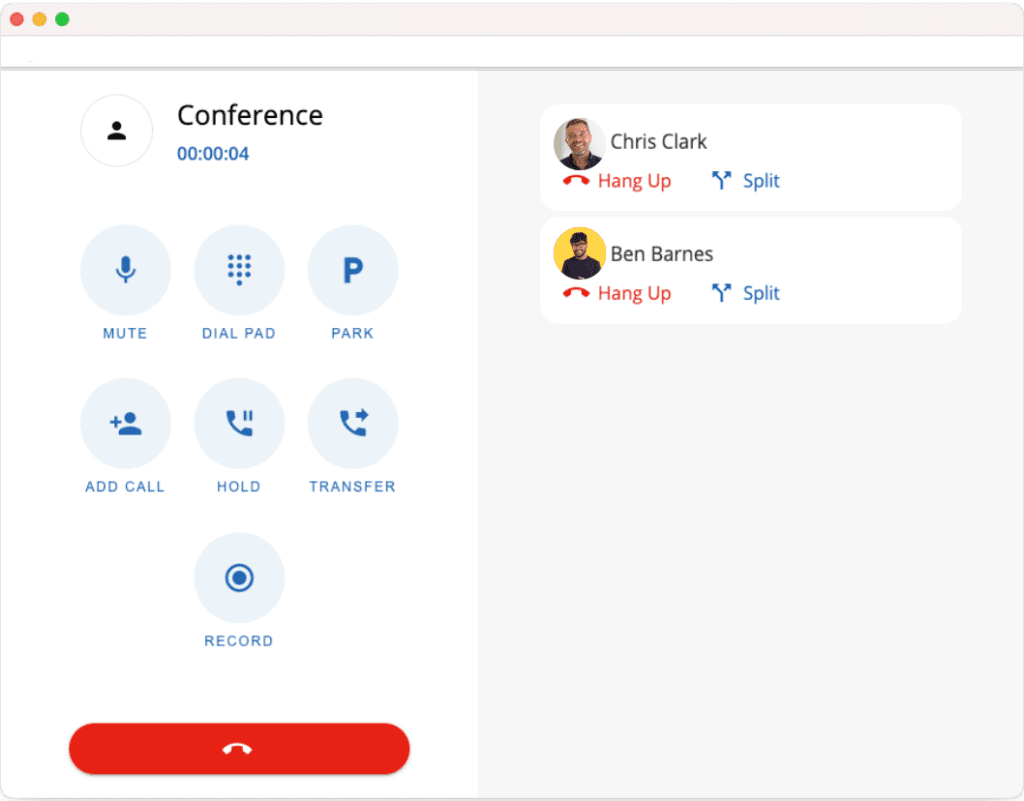
If the ‘MERGE’ button is selected, the two callers will be displayed on the right-hand side, as seen in the image below. A user may disconnect from either party by clicking the ‘Hang Up’ button under the selected user’s contact information.
If the ‘Split’ button is selected under a user’s name, that user will become the active call, and the other call leg will be placed on hold.
Hold
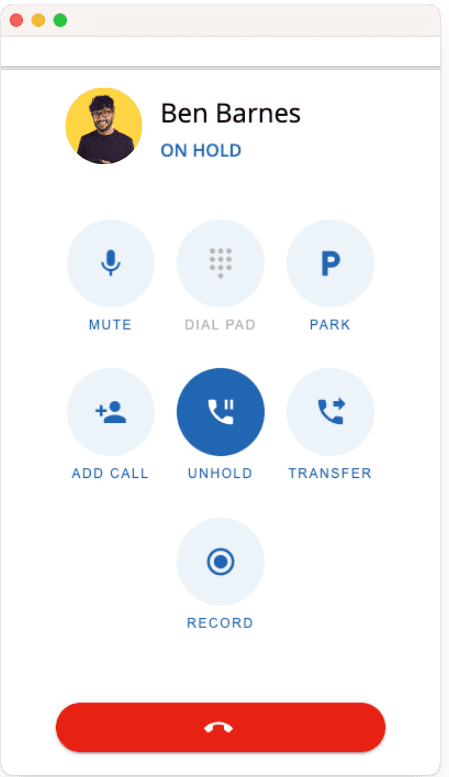
Selecting the ‘HOLD’ button places the call on hold, where the other party will hear hold music. Selecting the ‘UNHOLD’ button on a held call will take the call off hold and become an active call.
Transfer
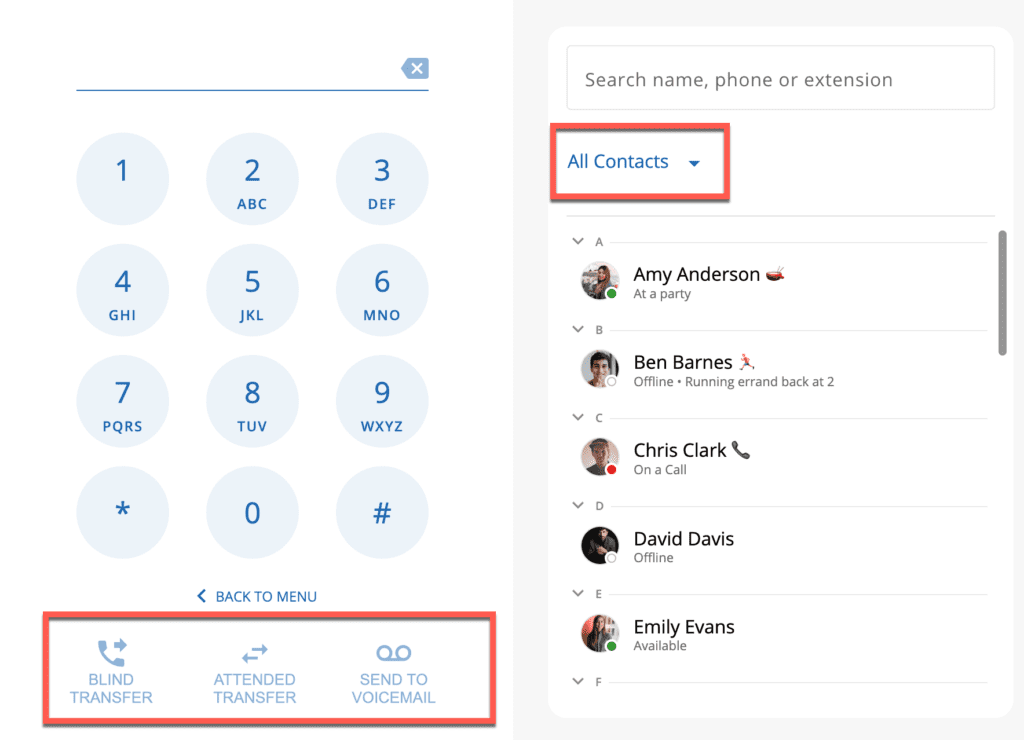
Selecting the ‘TRANSFER’ button allows the user to initiate a transfer to an external number, extension, or Voicemail box.
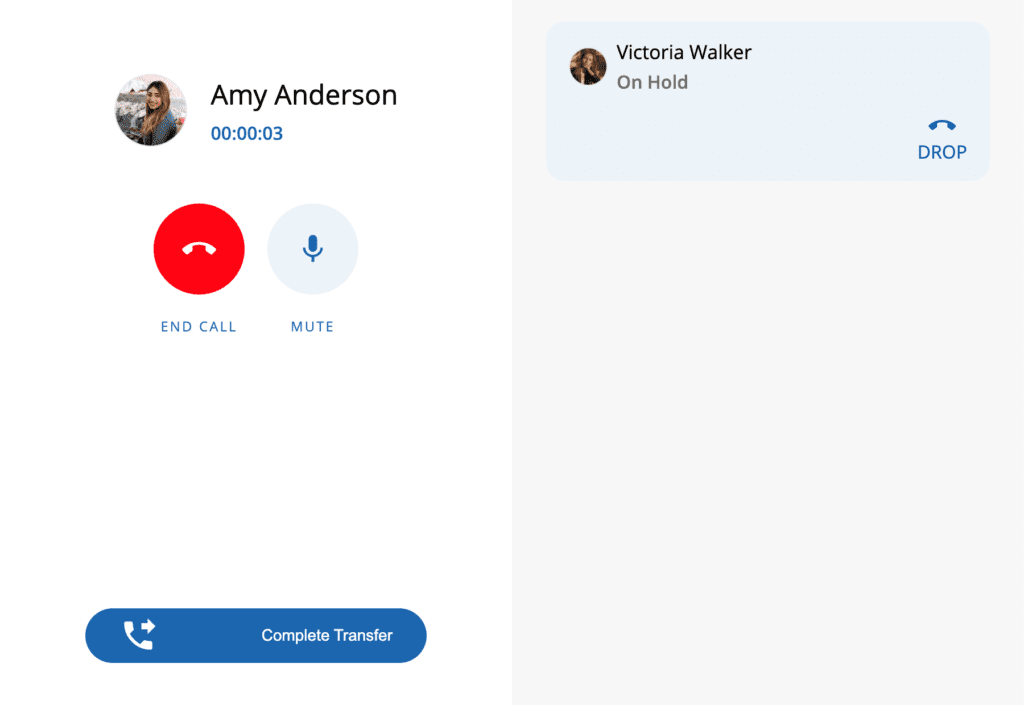
From the transfer menu, begin by selecting where you want to transfer the call by selecting a Contact on the right-side menu. Once the destination/contact is selected, click on ‘Transfer’ to initiate either a ‘Blind Transfer’, ‘Attended Transfer’ if you wish to talk to the other party first, or you may transfer the call directly to a contact’s Voicemail box.
To complete an Attended Transfer, click the ‘Complete Transfer‘ button at the bottom of the screen.
Record
Selecting the ‘RECORD’ button initiates on-demand call recording. Once selected, the user has the option to ‘STOP’ the recording or ‘PAUSE’ the recording.
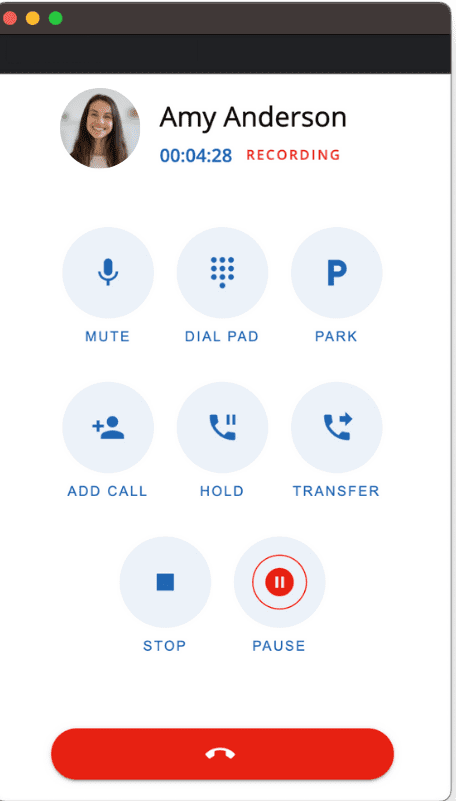
Note: VQTECH does not support local call recording storage. If the extension does not have call recording enabled, the record option will not appear.
